
React hooks are a basic and essential part for any aspiring developer in this framework. They help manage a lot of functionality that would be difficult to create from scratch: getting and setting variables, executing functions on page renders, minimizing variable and function calls, and even state management! I’m going to talk about the eight most commonly used React hooks that I use, and a brief explanation as to what they do. I’ve also included a demo you can interact with!
Last little side note not only am I using TypeScript, but I’m also using TailwindCSS and some custom reusable components (viz. Box and Button). If you have any questions about the styling, send me a message and I’ll be happy to explain.
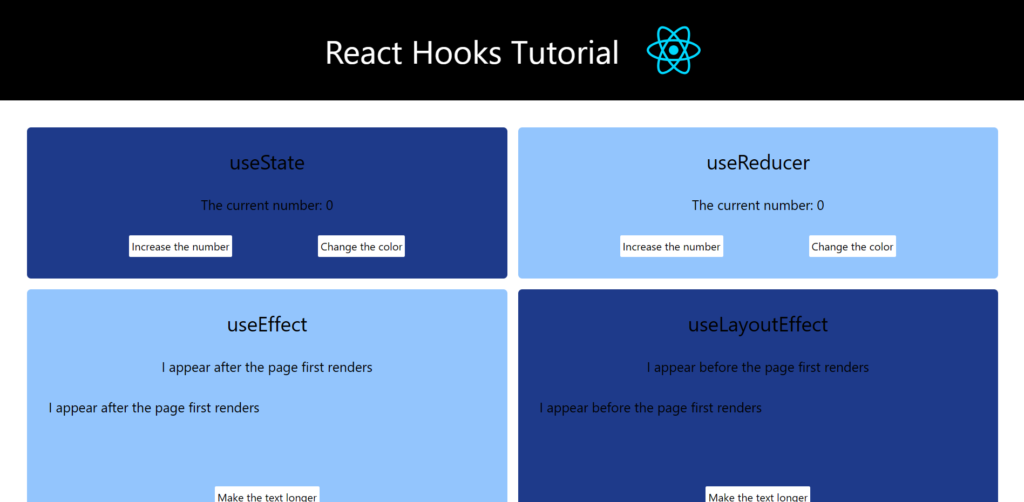
useState Hook
The useState hook is used to get and set variables. What is simply means is that we can get the value/state of a variable or set/change its value/state.
import { useState } from "react";

import Box from "../components/Box";
import Button from "../components/Button";

function UseStateExample() {
  const [count, setCount] = useState<number>(0);
  const [isWhite, setIsWhite] = useState<boolean>(false);

  return (
    <Box color="bg-blue-900">
      <h2 className="text-3xl">useState</h2>

      <p
        className={`text-xl ${isWhite && "text-white"} transition duration-300`}
      >
        The current number: {count}
      </p>

      <div className="w-full flex justify-evenly gap-2">
        <Button onClick={() => setCount((prevCount) => prevCount + 1)}>
          Increase the number
        </Button>

        <Button onClick={() => setIsWhite((prevState) => !prevState)}>
          Change the color
        </Button>
      </div>
    </Box>
  );
}

export default UseStateExample;
If we look at the above code, we first declare our getter and setter (viz. const [count, setCount]), call the useState hook, give it a type since I’m using TypeScript (e.g. <number>), and pass an initial value in its state (e.g. 0). The first variable will always be our getter and the second variable will always be our setter, and you can name them whatever you want! However, it’s common convention to name the setter similarly to the getter, but with the word set prepended to it. These helps avoid any confusion!
You may also notice that my Button’s onClick uses callback functions [e.g. () => setIsWhite(...)]. I prefer using callback functions because it means the function will only execute when there is interaction. I also use a callback function within the setter to avoid some nasty bugs you can get, like completely overwriting the state. So, in setIsCount((prevCount) => prevCount + 1) we take our prevCount which is the state we want to modify (viz. count), then add one to it which updates the state.
useReducer Hook
The useReducer hook functions just like the useState hook. The only caveat is that it’s used to get and set multiple states!
import { useReducer } from "react";

import Box from "../components/Box";
import Button from "../components/Button";

type State = {
  count: number;
  isWhite: boolean;
};

type Action = {
  type: "increment" | "changeBoolean";
};

function UseReducerExample() {
  const initialState = {
    count: 0,
    isWhite: false,
  };

  const reducer = (state: State, action: Action) => {
    switch (action.type) {
      case "increment":
        return { ...state, count: state.count + 1 };
      case "changeBoolean":
        return { ...state, isWhite: !state.isWhite };
      default:
        throw new Error();
    }
  };

  const [state, dispatch] = useReducer(reducer, initialState);

  return (
    <Box color="bg-blue-300">
      <h2 className="text-3xl">useReducer</h2>

      <p
        className={`text-xl ${
          state.isWhite && "text-white"
        } transition duration-300`}
      >
        The current number: {state.count}
      </p>

      <div className="w-full flex justify-evenly gap-2">
        <Button onClick={() => dispatch({ type: "increment" })}>
          Increase the number
        </Button>

        <Button onClick={() => dispatch({ type: "changeBoolean" })}>
          Change the color
        </Button>
      </div>
    </Box>
  );
}

export default UseReducerExample;
The most obvious difference is that instead of having two states (e.g. count and isWhite), we have a single state that holds both of them and way to set a specific state (e.g. const [state, dispatch]). We first create an initial state (viz. initialState) that holds the names of our getters and their initial values. Then we create a reducer (viz. reducer) that uses a switch statement to determine which state needs to be updated. Then we can get a specific state by calling it from the state object (e.g. state.isWhite), and update it using dispatch (e.g. dispatch({ type: "changeBoolean" })).
What’s noticeable is that useReducer is obviously a lot of extra work if you only have a couple states, such as two in the above example. However, where it really shines is when you’re juggling seven or more states! Still, if you’re a beginner then I recommend you stick with useState.
useEffect Hook
The useEffect hook is used to execute certain functions when the page renders/first loads, and under specific circumstances that we can control.
import { useState, useEffect } from "react";

import Box from "../components/Box";
import Button from "../components/Button";

function UseEffectExample() {
  const [isShown, setIsShown] = useState<boolean>(false);
  const [longText, setLongText] = useState<string[]>([
    "I",
    "appear",
    "after",
    "the",
    "page",
    "first",
    "renders",
  ]);
  const [count, setCount] = useState<number>(0);

  useEffect(() => {
    setTimeout(() => {
      setIsShown(true);
    }, 1000);
  }, []);

  useEffect(() => {
    if (count > 0)
      setLongText((prevState) =>
        prevState.concat(["and", "when", "you", "click", "the", "button"])
      );
  }, [count]);

  return (
    <Box color="bg-blue-300">
      <h2 className="text-3xl">useEffect</h2>

      <p
        className={`text-xl ${
          !isShown && "text-transparent"
        } transition duration-300`}
      >
        I appear after the page first renders
      </p>

      <div className="w-full h-[100px] overflow-y-auto">
        <p className="text-xl">{longText.join(" ")}</p>
      </div>

      <Button onClick={() => setCount((prevState) => prevState + 1)}>
        Make the text longer
      </Button>
    </Box>
  );
}

export default UseEffectExample;
We first create our useEffect and pass the function(s) we want to execute inside the curly brackets. You will notice that both useEffects have a dependency array that is either empty (e.g. []), or has a variable inside it (e.g. [count]). What this means is that the respective useEffect will always execute the function(s) when the page using this component (viz. UseEffectExample) first renders, and whenever any of the variable(s) inside its dependency array change their values.
So, if we look at the second useEffect, it will attempt to execute the if statement [viz. if (count > 0)] when the page first loads and whenever count’s value changes. useEffect is really important when you want specific functions to execute depending on how the user interacts with the website!
useLayoutEffect Hook
The useLayoutEffect hook does exactly what the useEffect hook does. The only difference is that useEffect executes its functions after the page renders, and useLayoutEffect executes its functions before the page renders!
import { useState, useLayoutEffect } from "react";

import Box from "../components/Box";
import Button from "../components/Button";

function UseLayoutEffectExample() {
  const [isShown, setIsShown] = useState<boolean>(false);
  const [longText, setLongText] = useState<string[]>([
    "I",
    "appear",
    "before",
    "the",
    "page",
    "first",
    "renders",
  ]);
  const [count, setCount] = useState<number>(0);

  useLayoutEffect(() => {
    setIsShown(true);
  }, []);

  useLayoutEffect(() => {
    if (count > 0)
      setLongText((prevState) =>
        prevState.concat(["and", "when", "you", "click", "the", "button"])
      );
  }, [count]);

  return (
    <Box color="bg-blue-900">
      <h2 className="text-3xl">useLayoutEffect</h2>

      <p
        className={`text-xl ${
          !isShown && "text-green-500"
        } transition duration-300`}
      >
        I appear before the page first renders
      </p>

      <div className="w-full h-[100px] overflow-y-auto">
        <p className="text-xl">{longText.join(" ")}</p>
      </div>

      <Button onClick={() => setCount((prevState) => prevState + 1)}>
        Make the text longer
      </Button>
    </Box>
  );
}

export default UseLayoutEffectExample;
Looking at the above code, how useLayoutEffect is structured and utilized and exactly the same as useEffect. So, we may be asking ourselves what is the point in having two React hooks that do literally the same thing?
First of all, useEffect is useful if the changes made by functions need to be visually seen by the user, such as an on entrance animation that happens once. Alternatively, useLayoutEffect is useful if the changes made should not be seen by the user. An example would be rendering one of two components depending on a condition, such as a Login or Logout button in a navbar. If we were to use the useEffect hook instead, the users would briefly see the text flicker between Login or Logout. But if we used useLayoutEffect then the flicker wouldn’t appear at all!
useMemo Hook
For any of us who are not familiar with memoization, what it does is it allows the computer to memorize the value of variables or the output of functions. For instance, if we had a globally scoped variable that executed some logic (e.g. const sum = 1 + 2 + 3), then every time the component is rendered, this variable will always perform that logic.
Instead of wasting unnecessary computing power, we can memoize it so that the computer will only execute the logic when the variable’s value changes. In React, the useMemo hook is used to memoize those variables.
import { useState, useMemo } from "react";

import Box from "../components/Box";
import Button from "../components/Button";

function UseMemoExample() {
  const [count, setCount] = useState<number>(0);
  const [isWhite, setIsWhite] = useState<boolean>(false);

  const longCalculation = (num: number) => {
    for (let i = 0; i < 1_000_000_000; i++) num += 1;

    return num;
  };

  const memoizedCount = useMemo(() => longCalculation(count), [count]);

  return (
    <Box color="bg-blue-900">
      <h2 className="text-3xl">useMemo</h2>

      <p
        className={`text-xl ${isWhite && "text-white"} transition duration-300`}
      >
        The current memoized number: {memoizedCount}
      </p>

      <div className="w-full flex justify-evenly gap-2">
        <Button onClick={() => setCount((prevCount) => prevCount + 1)}>
          Increase the number
        </Button>

        <Button onClick={() => setIsWhite((prevState) => !prevState)}>
          Change the color
        </Button>
      </div>
    </Box>
  );
}

export default UseMemoExample;
So, in our above example we have a variable called longCalculation that performs logic that requires the computer to count to one million. The issue is that we have an unrelated getter called isWhite and whenever its state is changed using its setter, it re-renders the entire page causing longCalculation to execute again. To avoid the problem, we are going to memoize longCalculation to only perform its logic when only longCalculation’s value changes and not when isWhite’s state changes.
We take the variable we want to memoize, pass it through useMemo and give it a dependency array. Unlike useEffect this dependency array cannot be empty! The variable we want to pass into this dependency array will determine when this variable should recalculate its value. In this case I’m using count because count is an argument in longCalculation’s logic.
useCallback Hook
The useCallback hook is similar to the useMemo hook, except instead of memoizing a variable it memoizes a function.
import { useState, useCallback } from "react";

import Button from "../components/Button";
import ChildUseCallback from "../components/ChildUseCallback";

function UseCallbackExample() {
  const [longText, setLongText] = useState<string[]>([
    "I",
    "go",
    "on",
    "forever",
  ]);
  const [isWhite, setIsWhite] = useState<boolean>(false);

  const memoAddText = useCallback(() => {
    let num = 0;

    for (let i = 0; i < 1_000_000_000; i++) {
      num += 1;
    }

    if (num === 1_000_000_000)
      setLongText((prevText) => [...prevText, "and", "ever"]);
  }, [longText]);

  return (
    <div className="grid grid-cols-1 lg:grid-cols-2 grid-rows-2 lg:grid-rows-1 gap-8 bg-blue-300 p-8 rounded-md">
      <div className="col-span-1 flex flex-col items-center justify-between p-8">
        <h2 className={`${isWhite && "text-white"} text-3xl`}>useCallback</h2>

        <Button onClick={() => setIsWhite((prevState) => !prevState)}>
          Change the color
        </Button>
      </div>

      <ChildUseCallback longText={longText} memoAddText={memoAddText} />
    </div>
  );
}

export default UseCallbackExample;
Looking at the above parent component, we have a function that takes a the computer a while to execute called memoAddText. The useCallback comes with a dependency array and is structured just like useMemo. Next, let’s look at the child component: ChildUseCallback.
import { useContext } from "react";

import Box from "./Box";
import Button from "./Button";

import { CountContext } from "../contexts/CountContext";

function ChildUseContext() {
  const { count, setCount } = useContext(CountContext);

  return (
    <Box color="bg-blue-500">
      <h2 className="text-3xl">useContext Child</h2>

      <p className="text-xl transition duration-300">
        The current number: {count}
      </p>

      <Button onClick={() => setCount(count + 1)}>Increase the number</Button>
    </Box>
  );
}

export default ChildUseContext;
So the memoAddText is passed into this child component. If we didn’t have useCallback on that function, then whenever the unrelated getter in the parent component (viz. isWhite) executes, it will re-render this child component and, in turn, execute the memoAddText function again.
By using useCallback, the memoAddText function will only ever execute when the variable(s) in its dependency array changes and will not affect other variables or functions being used in its parent component(s).
useRef Hook
The useRef hook is similar to useState but with two noticeable differences. First, useRef is only a variable with an initial state instead of it being a pair of getters and setters. Second, whenever the useRef variable changes, it only is reflected in the UI (User Interface) whenever the page re-renders.
import { useState, useEffect, useRef } from "react";

import Box from "../components/Box";
import Button from "../components/Button";

function UseRefExample() {
  const [rerender, setRerender] = useState<boolean>(true);
  const count = useRef(0);

  const incrementCount = () => {
    count.current = count.current + 1;
  };

  useEffect(() => {
    console.log("UseRef rerendered");
  }, [rerender]);

  return (
    <Box color="bg-blue-300">
      <h2 className="text-3xl">useRef</h2>

      <p className="text-xl transition duration-300">
        The current number: {count.current}
      </p>

      <div className="w-full flex justify-evenly gap-2">
        <Button onClick={incrementCount}>Increase the number</Button>

        <Button onClick={() => setRerender((prevRerender) => !prevRerender)}>
          Rerender
        </Button>
      </div>
    </Box>
  );
}

export default UseRefExample;
I can guarantee many of us are wondering what is the point in useRef then. It doesn’t have as much functionality as useState, and we would usually want the updated variable reflected in the UI as soon as possible!
Well the upside is that sometimes we have a variable tracking something that shouldn’t be reflected in the UI. One example are the analytics being tracked on certain social media platforms, like Twitter and LinkedIn. The user doesn’t need to know how many followers they received today, and the app shouldn’t have to re-render every time we receive a follower since nothing in the UI changes. Rather, the app should save it as a useRef variable so that it could be visible later if the user wants to know.
useContext Hook
So, I’ve saved the most unique React hook for last: useContext! This hook is needed for an important feature that the React framework lacks: state management. The useContext hook provides a setter and getter for specific state(s), and makes them accessible throughout the entire app.
import { createContext, ReactNode, useState } from "react";

type ContextType = {
  count: number;
  setCount: (count: number) => void;
};

export const CountContext = createContext<ContextType>({
  count: 0,
  setCount: () => null,
});

export const CountContextProvider = ({ children }: { children: ReactNode }) => {
  const [count, setCount] = useState<number>(0);

  const value = { count, setCount };

  return (
    <CountContext.Provider value={value}>{children}</CountContext.Provider>
  );
};
What we have above is a CountContextProvider. We first create a context (viz. CountContext) that holds variables and functions with their initial state. We then create a provider (viz. CountContextProvider) that uses the useState hook to create setters and getters that match with the respective variables and functions from the initial state.
An additional thing to note is that the provider wraps around children, and the children will be anything between <CountContextProvider>, namely other React nodes such as components.
import React from "react";
import ReactDOM from "react-dom/client";
import App from "./App.tsx";
import "./index.css";
import { CountContextProvider } from "./contexts/CountContext.tsx";

ReactDOM.createRoot(document.getElementById("root")!).render(
  <React.StrictMode>
    <CountContextProvider>
      <App />
    </CountContextProvider>
  </React.StrictMode>
);
Here, I have wrapped my entire app with the provider which exposes count and setCount to every component. However, you can wrap it around other nested components within <App/> to only expose to the components that really need it.
import { useContext } from "react";

import Button from "../components/Button";
import ChildUseContext from "../components/ChildUseContext";

import { CountContext } from "../contexts/CountContext";

function UseContextExample() {
  const { count, setCount } = useContext(CountContext);

  return (
    <div className="grid grid-cols-1 lg:grid-cols-2 grid-rows-2 lg:grid-rows-1 gap-8 bg-blue-900 p-8 rounded-md">
      <div className="row-span-1 col-span-1 flex flex-col items-center justify-between p-8">
        <h2 className="text-3xl">useContext</h2>

        <p className="text-xl transition duration-300">
          The current number: {count}
        </p>

        <Button onClick={() => setCount(count + 1)}>Increase the number</Button>
      </div>

      <ChildUseContext />
    </div>
  );
}

export default UseContextExample;
Now, in order to access the count and setCount within our provider, we call on useContext and pass in the context we want to access (viz. CountContext). We destructure the values from the provider within it, which are count and setCount and now we can use the setter and getter! Furthermore, we could open any of the previous components I mentioned, use this useContext and also have access to the same things!
import { useContext } from "react";

import Box from "./Box";
import Button from "./Button";

import { CountContext } from "../contexts/CountContext";

function ChildUseContext() {
  const { count, setCount } = useContext(CountContext);

  return (
    <Box color="bg-blue-500">
      <h2 className="text-3xl">useContext Child</h2>

      <p className="text-xl transition duration-300">
        The current number: {count}
      </p>

      <Button onClick={() => setCount(count + 1)}>Increase the number</Button>
    </Box>
  );
}

export default ChildUseContext;
But be careful! As seen in the above child component, we have access to the same count and setCount from its parent component. If you go to the demo I made and test both the buttons, you’ll find each button updates both numbers! The reason is because they are sharing the same getter’s state now, so changing it one location will update it globally.
Conclusion

And there we have it! The eight React hooks I use the most personally and at my current occupation. There are some additional hooks that I didn’t mention that have niche uses, but they’re quite easier to understand and utilize. If you have any further questions, feel free to post a comment or send me an email!
“We can imagine the impossible, provided we do not imagine it in perfect detail and all at once.”
~ David Kellogg Lewis